9.2 Setup
First we set up CAMS. If you are working with FTP_CaptureDonglesAndDetect.exe. The first thing we have to do is to adjust DonglesConfig.txt.
Desired frame rate in integer fps (-1 use default) = 25
Adjust the frame rate to the desired one (PAL:25/NTSC:30)
Desired number of rows (-1 use default) = 480
Desired number of cols (-1 use default) = 640
#frames for FF file compression (-1 use default) = 256
Connection type see below (-1 use default) = 0
Only 0 is used for the moment
Video format see below (-1 use default) = 1
Video Format NTSC:0/PAL:1
Flip red and blue BGR use 1, for std RGB use 0 = 0
Flip image upside-down use 1, else 0 = 1
1st PC assigned device#, cam#, brightnes, contrast = 0, 385, -1, -1
2nd PC assigned device#, cam#, brightnes, contrast = 1, -99, -1, -1
3rd PC assigned device#, cam#, brightnes, contrast = 2, -99, -1, -1
4th PC assigned device#, cam#, brightnes, contrast = 3, -99, -1, -1
5th PC assigned device#, cam#, brightnes, contrast = 4, -99, -1, -1
6th PC assigned device#, cam#, brightnes, contrast = 5, -99, -1, -1
7th PC assigned device#, cam#, brightnes, contrast = 6, -99, -1, -1
8th PC assigned device#, cam#, brightnes, contrast = 7, -99, -1, -1
You have to fill in at least 1 camera number, it doesn’t matter for the moment if the camera number and device number aren’t matching
- cam# = -99 informs the app to ignore that associated device number
- Brightness and contrast levels = [0,100], -1 to use default
- default #frames = 256
- default imagery settings are NTSC 30 fps, 640 x 480
—————————————————————
Connection types: VI_COMPOSITE 0
VI_S_VIDEO 1
VI_TUNER 2
VI_USB 3
VI_1394 4
—————————————————————
Video Formats: VI_NTSC_M 0
VI_PAL_B 1
VI_PAL_D 2
VI_PAL_G 3
VI_PAL_H 4
VI_PAL_I 5
VI_PAL_M 6
VI_PAL_N 7
VI_PAL_NC 8
VI_SECAM_B 9
VI_SECAM_D 10
VI_SECAM_G 11
VI_SECAM_H 12
VI_SECAM_K 13
VI_SECAM_K1 14
VI_SECAM_L 15
VI_NTSC_M_J 16
VI_NTSC_433 17
Save and exit DonglesConfig.txt.
Let’s start CameraLiveViewer.exe in the cams folder (see Figure 53).
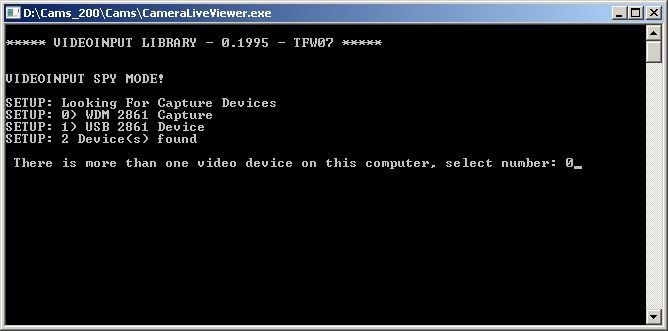
Figure 53 – Screenshot when the executable CameraLiveViewer is being started.
We’ll start with selecting device “0” and hit enter.
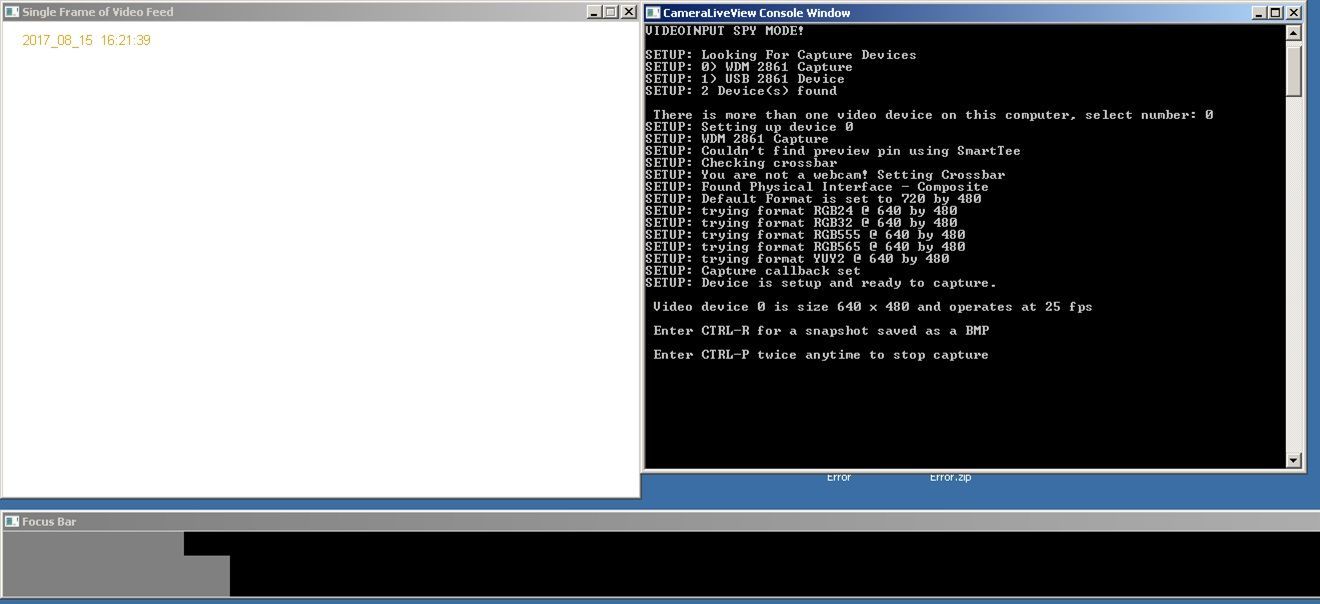
Figure 54 – Screenshot when the executable CameraLiveViewer is running.
I did this during daytime; reason why the camera is saturated (see Figure 54: white image). I’ll use 2 cameras in this example. Now we have to determine the camera number corresponding to the device number. You can do this by placing a sheet of paper/cardboard or something else in front of the camera. If the camera image doesn’t change, you have to place the sheet of paper/cardboard on the next camera. You repeat doing this until the camera image changes. That is the camera with device number 0. It’s easy to label the connection now. This can save you a lot of time in the future when dealing with trouble shooting. Let us close the CameraLiveViewer program now. (e.g. device 0 is camera 387)
Now we open CameraLiveViewer again, but we use “1” for device number now. Again we have to determine the corresponding camera, and its number. (e.g. device 1 is camera 385)
Repeat this until all device numbers are checked.
We have to adjust the file DonglesConfig.txt for this device/camera numbers.
Look for these lines and adjust them:
- 1st PC assigned device#, cam#, brightnes, contrast = 0, 387, -1, -1
- 2nd PC assigned device#, cam#, brightnes, contrast = 1, 385, -1, -1
Save it and close DonglesConfig.txt
Start FTP_CaptureDonglesAndDetect.exe (see Figure 55).
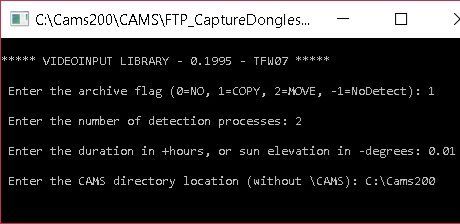
Figure 55 – Screenshot input FTP_CaptureDonglesAndDetect.
- As archive flag use 1
- As number of detection processes we use 1
- Duration 0.01 h (note the decimal dot, NO comma)
- Cams directory: where the cams folder is located without the \cams
If everything went fine, you should be capturing for 0.01h. If not you’ll have to start looking what went wrong before proceeding.
Let us start LaunchCapture.exe (see Figure 56).

Figure 56 – Screenshot when the executable LaunchCapture is being started.
- CamsDir: directory where cams is placed
- CamsNumber: First camera number
- Latitude: Latitude for first camera number in txt (North +/South -)
- Longitude: Longitude for first camera number in txt (West +/East -)
- Sunset for that day in local time
- Sunrise the next morning in local time
- FTP_*****: FTP_Capture program to use
- Time to launch capturing: countdown timer from now until Sunset
- Power Timer On: when you should schedule a mechanical/electronic timer to set power on to the camera in local time
- Power Timer Off: when you should schedule a mechanical/electronic timer to set power off to the camera in local time
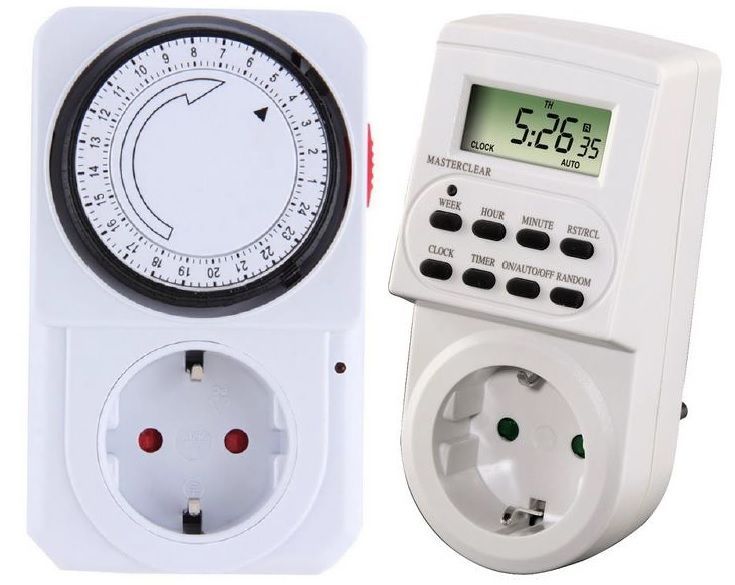
Figure 57 – A mechanical and an electronic timer.
Another option is to let the computer control the power of the camera. This has been done successfully with a pdu from pduexpert. The pdu is controlled through SNMP. https://www.kvmchoice.com/detail_switch.asp?id=11760
Another option is to control power with a yoctopuce powerrelais. https://www.yoctopuce.com/EN/products/usb-actuators/yocto-powerrelay
If you want the computer to take control of the power of the camera, you have to set PowerCamera = true in CamsGUI.ini else PowerCamera = false. The scripts to control the power are camera_on.bat and camera_off.bat. You will have to write them yourself.

